Find, inspect, and edit dataset samples
Use split tabs, search, filters, card, list, and table views, then inspect processing and edit only the intended sample scope.
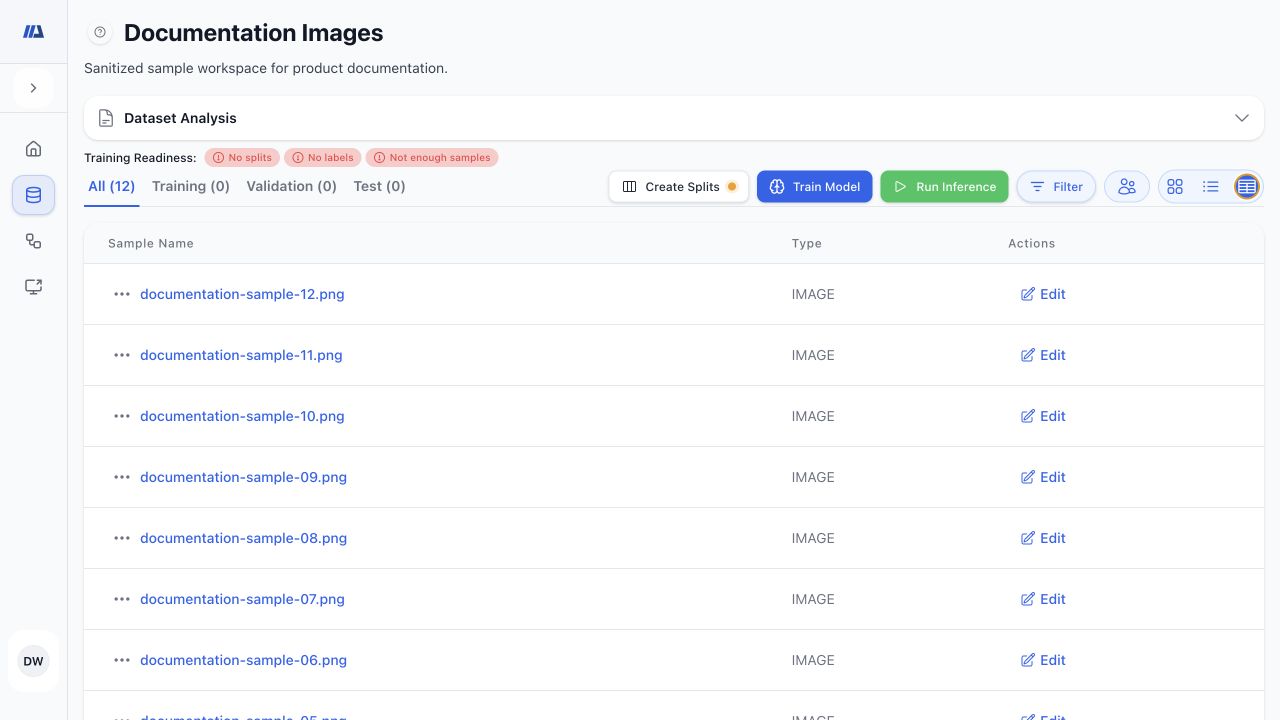
Choose a split and view#
Before you begin
- Confirm that split creation or processing has completed before comparing counts.
- Select the sample scope
Choose All, Training, Validation, or Test and note that later filtering applies within the active scope.
- Choose Card view
Use cards for visual scanning and quick inspection of image-like or media samples.
- Choose List view
Use the compact list when names, states, and metadata matter more than large previews.
- Choose Table view
Use the table for structured fields and tabular datasets when the option is available.
- Verify the result count
Check that the displayed count and visible samples match the selected split before taking a bulk action.
Search and filter without losing scope#
Before you begin
- Choose the intended split and wait for the current result count before applying filters.
- Start with the split
Choose the split first so the query does not accidentally mix training and evaluation samples.
- Search by the available text fields
Enter a filename, sample name, or other supported query and wait for the result list to update.
- Apply filters incrementally
Add one label, annotation, state, or other available filter at a time and observe how the result count changes.
- Inspect the active scope
Before selecting all or cloning filtered samples, confirm the split, query, active filter chips, and current result count.
- Recover from no matches
Clear the query and filters in reverse order until the expected samples return.
Inspect a sample in the detail dialog#
Before you begin
- Open a sample from the current filtered result so previous and next navigation stays within the intended review scope.
- Open a representative sample
Select a sample and compare its preview, name, metadata, and processing state with the source data.
- Review annotations
Inspect available detections, segmentations, and classifications, including label names and values.
- Navigate consistently
Use Previous and Next to review neighboring samples without losing the active result scope.
- Respond to state
Wait when a sample is still processing. Record the visible failure when it reaches a failed or unavailable state instead of assuming it is empty.
- Use the correct action
Open annotation editing or another available sample action only after confirming the sample identity and permissions.
Run sample actions and follow progress#
Before you begin
- Confirm the selected samples and active filters before starting a bulk operation.
- Select the exact samples
Select individual samples or the visible filtered scope only after checking the result count.
- Choose a supported action
Use the offered edit, annotation, split, copy, remove, delete, or other action for the current data type.
- Confirm destructive scope
For removal or deletion, read the confirmation and distinguish removing a sample from the dataset from deleting data when the UI presents that choice.
- Follow progress
Keep the operation status visible through queued, processing, completed, or failed states.
- Refresh and reconcile
After completion, refresh the sample count and review failures before repeating an action.
Edit tabular samples carefully#
Before you begin
- Export or otherwise preserve the source before a broad tabular change.
- Confirm whether the intended action changes one value, a row, or a column.
- Open Table view and Edit
Navigate to the relevant rows and columns, then enter the available edit mode.
- Change only intended values
Edit supported cells or fields and preserve types expected by the dataset and labels.
- Distinguish row actions
Use Remove Row or Delete Row only after reading the displayed scope and consequence.
- Treat column deletion as broad
Delete Column affects the field across the table; verify the column name and downstream task before confirming.
- Save and re-open
Save the edit, refresh the table, and verify representative rows plus readiness or analysis affected by the change.