Deploy and test a model
Create or open a deployment for an eligible completed model, activate it deliberately, and run a representative test.
Check deployment eligibility#
- A completed training label alone is not sufficient; the selected version must include a deployable model result.
- If a deployment already represents the intended model, open and update that deployment instead of creating an accidental duplicate.
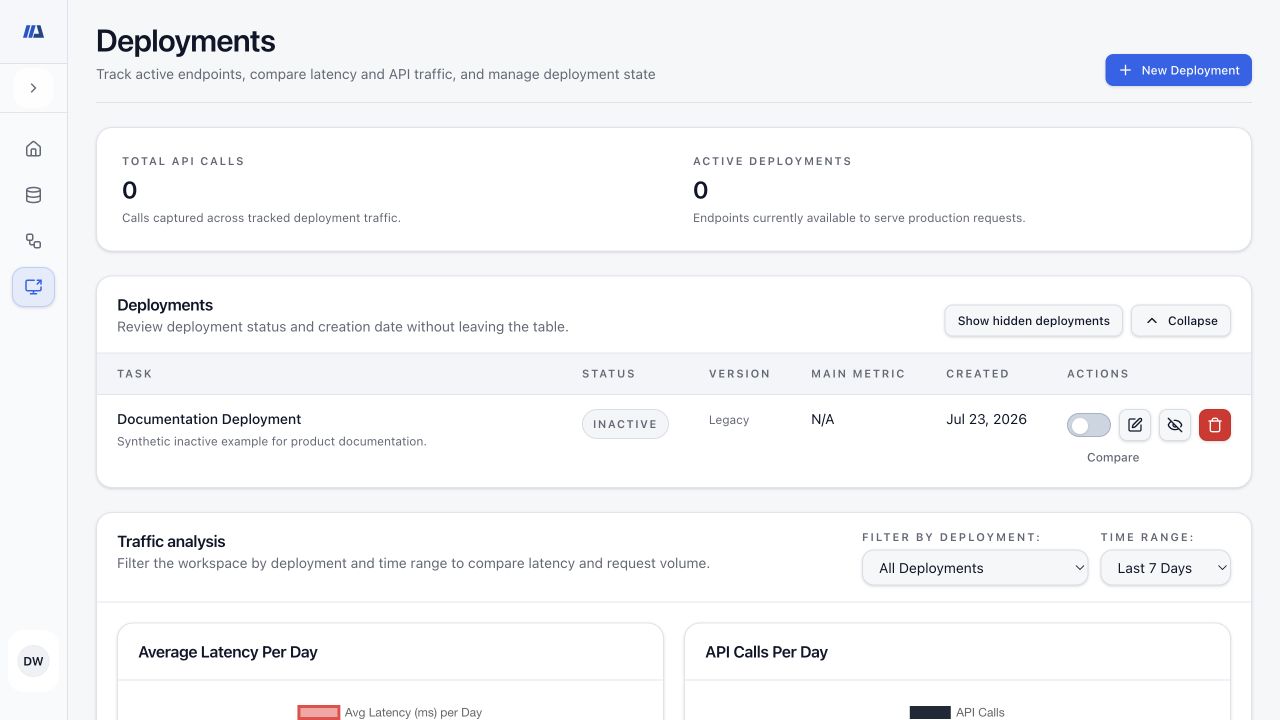
- Activation controls whether the model accepts prediction traffic. Hiding a row does not deactivate its model.
Create and activate the deployment#
- Select the model version
On the completed pipeline, choose the exact model version whose evaluation you reviewed.
- Select Deploy
Confirm the deployment request once. If the platform finds an existing deployment for the intended model, open it rather than submitting another request.
- Wait for readiness
Return to Deployments and wait until preparation finishes. Read the displayed state before retrying or changing the model.
- Review the deployment
Confirm the name, description, selected model version or checkpoint, primary metric, and current active state.
- Activate deliberately
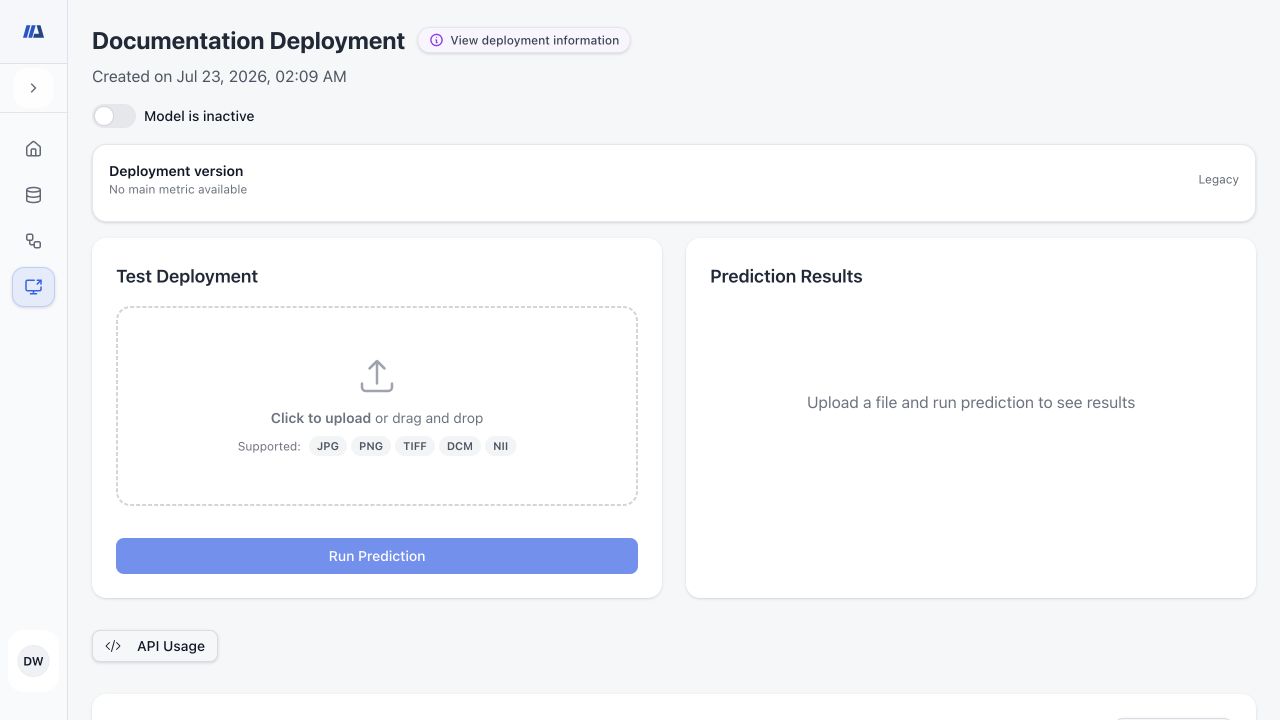
Turn on Model is active only when the deployment is ready to receive traffic and affected API consumers are prepared.
Run a first UI test#
- Open the deployment
Select the deployment name or its View action to open the detail page.
- Confirm model information
Open model information and verify the task, input type, selected version, and expected output before uploading data.
- Provide one representative input
Use the input control shown for the deployed task. Do not upload credentials, unrelated personal information, or production data merely to test the interface.
- Select Run Prediction
Submit once and wait for the on-screen state to move from processing to a result or a clear error.
- Review the complete result
Check the prediction summary, raw response, media or explanation panels, and the new execution-history entry.