Import, verify, and export annotations
Map CSV, platform JSON, COCO, or mask annotations, inspect the preview, resolve errors, and manage annotation files safely.
Choose an import format and inspect the preview#
Before you begin
- Open the destination dataset and confirm that you can edit its annotations.
- Check whether the destination test split is locked before assigning imported samples to Test.
- Open Upload Annotations
Choose the format that matches the source file instead of converting it implicitly in the dialog.
- Add one source file or mask set
Select the CSV or JSON file, or select at least one mask for mask import.
- Review detected content
Inspect sample, annotation, label, category, image, or color counts shown in the preview.
- Map fields and labels
Complete every required sample-name, label-field, category, or foreground-color mapping before upload.
- Confirm the destination scope
Choose an optional split only when appropriate. Test is unavailable when the destination splits are locked.
- Upload once and verify
Submit the import, review the result summary, and re-open matched samples before importing another file.
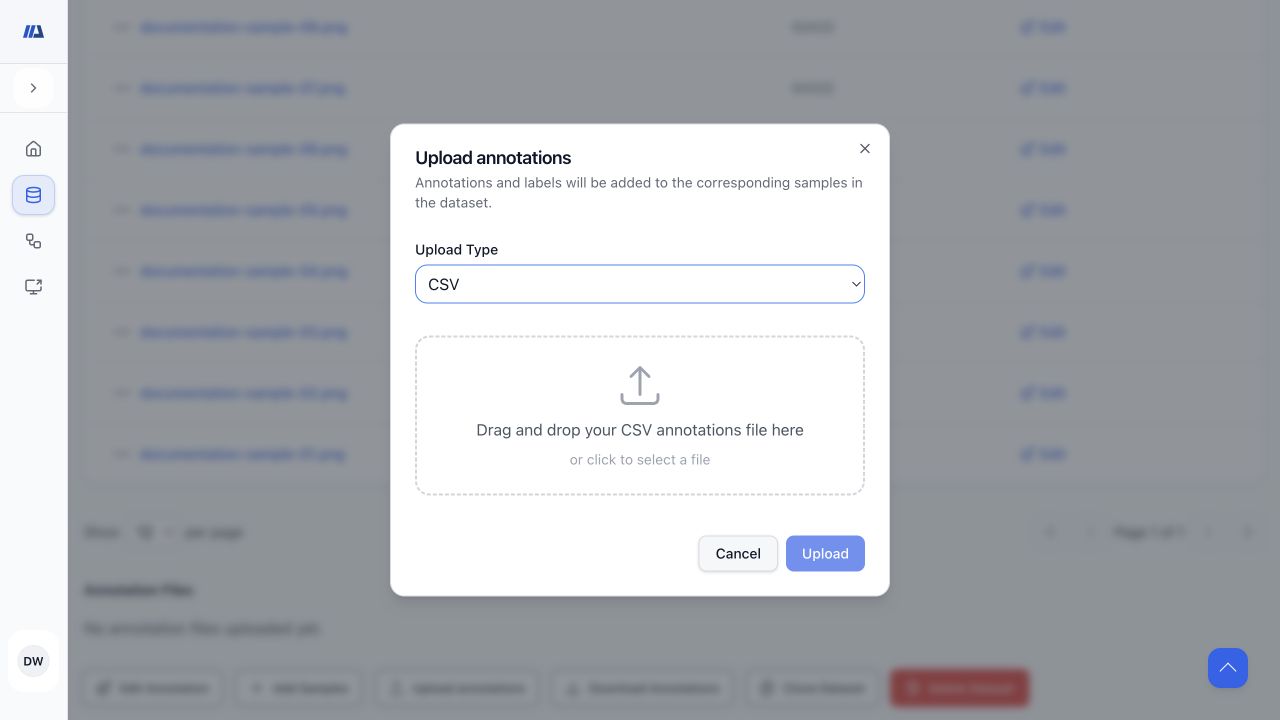
Import annotations from CSV#
Before you begin
- Ensure the CSV has a header row and a stable sample-name or filename column.
- Decide whether each label column is categorical, continuous, segmentation, or intentionally ignored.
- Select the sample-name field
Map the CSV column that contains the name used by the existing dataset samples.
- Map label fields
Set each relevant field to Categorical, Continuous, or Segmentation, and leave unrelated fields as None.
- Choose an optional split
Assign imported matches to an available split only when that is part of the intended data policy.
- Inspect the preview
Check mapped fields, match counts, label values, and any skipped rows before submitting.
- Verify representative rows
Open samples from different parts of the CSV and confirm categorical values, numeric values, or segmentation data as applicable.
Import platform JSON or COCO JSON#
Before you begin
- Validate that the file contains JSON rather than a JavaScript object or newline-delimited records.
- For COCO, preserve filename, category, image, and annotation relationships.
- Select the JSON type
Choose platform JSON for native sample annotation objects or COCO JSON for a COCO dataset structure.
- Check the structural preview
For platform JSON, review sample, annotation, and label counts. For COCO, review images, annotations, categories, and filename matches.
- Resolve mismatches
Correct missing arrays, unknown categories, duplicate identifiers, or filenames that do not match destination samples.
- Import and inspect geometry
After completion, open representative classifications, boxes, polygons, or other supported geometry and confirm placement and labels.
Import masks with explicit color mapping#
Before you begin
- Ensure mask filenames can be matched to dataset images.
- Know whether all foreground pixels represent one label or multiple color-coded labels.
- Add masks
Select one or more mask files and wait for foreground-color detection to finish.
- Choose a mapping method
Use a single label when all foreground belongs to one class, or use color mapping for multi-class masks.
- Map every foreground color
Assign each detected non-background color to the intended dataset label before upload.
- Review matches and import
Confirm filenames, detected colors, and mapped labels, then submit and inspect mask alignment on representative samples.
Review errors and verify the imported result#
Before you begin
- Keep the original source file and the completed import summary available for comparison.
- Read the full result summary
Record matched, imported, skipped, unmatched, and failed counts instead of relying only on the success banner.
- Correct the source
Use the referenced row, filename, category, field, color, or geometry to repair the input outside the platform.
- Inspect matched and unmatched cases
Open several successfully matched samples and compare them with examples that were skipped or unmatched.
- Retry only corrected data
Avoid duplicating successful annotations by limiting the retry to unresolved content whenever the source format allows it.
Export annotations and manage import history#
Before you begin
- Choose the split and format required by the receiving workflow.
- Before deleting a history file, confirm the exact filename and review the confirmation shown by the platform.
- Download current annotations
Choose Download Annotations, select All or one split, select CSV or JSON, and wait for export preparation and browser download.
- Review Annotation Files
Use the history to identify previously uploaded annotation sources and their available metadata.
- Download an original file
Use the file download action when you need to audit or correct the imported source.
- Delete a history file cautiously
Choose delete only when permitted, read the confirmation for the exact file, and verify the dataset afterward. File-history deletion is a separate operation from editing sample annotations.