Create a dataset and add samples
Choose the right creation path, upload or register supported data, and follow asynchronous processing to completion.
Choose a creation mode#
Before you begin
- Confirm the active organization before creating the dataset.
- Use a unique, non-sensitive name and a description that explains the intended task.
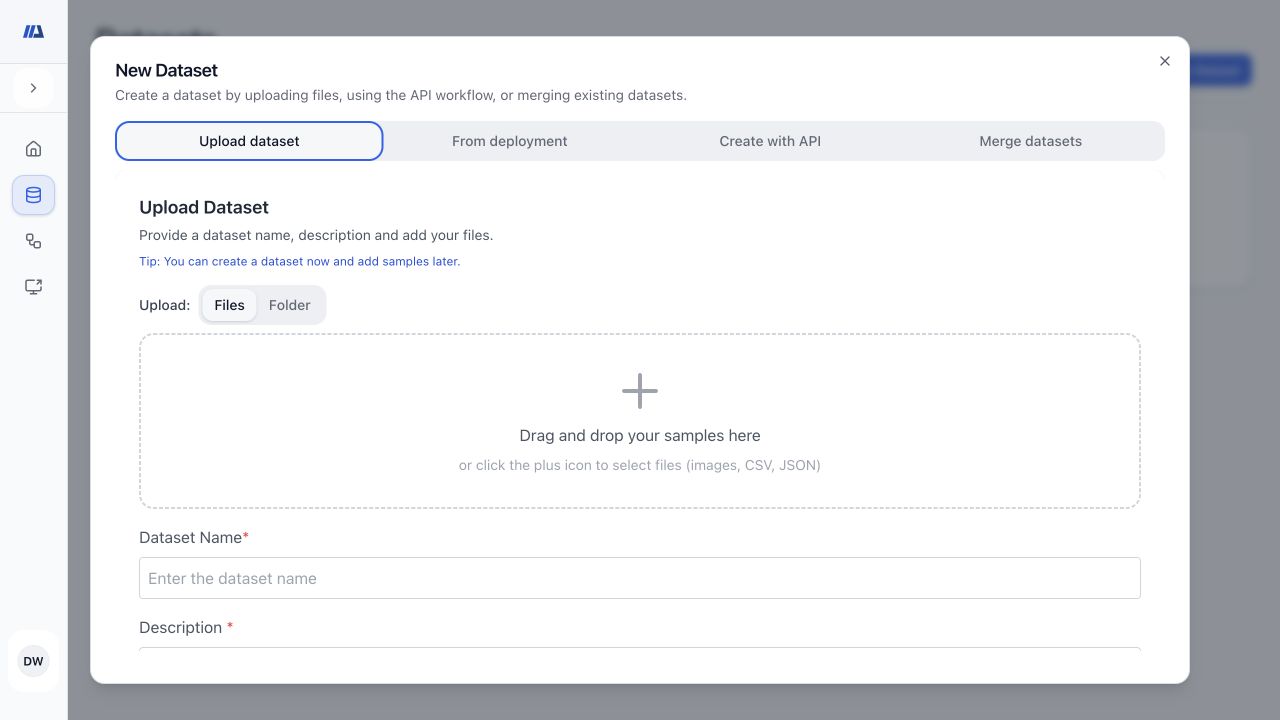
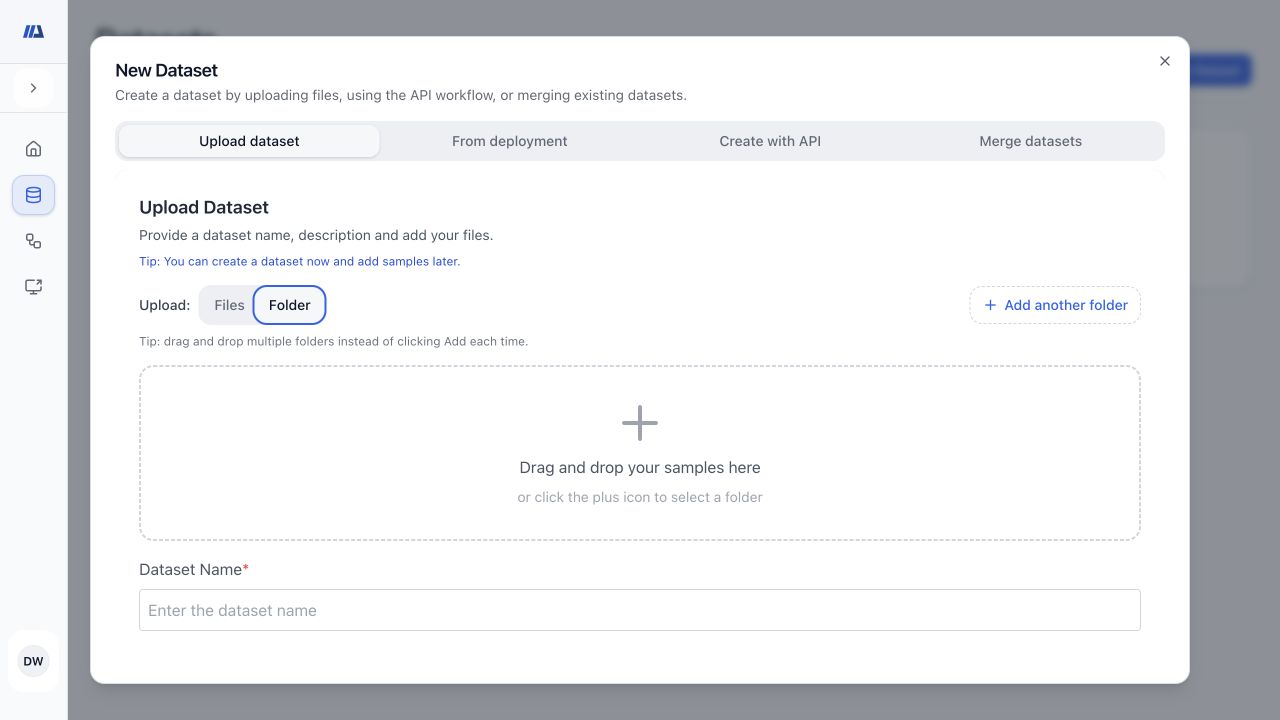
- Upload dataset: choose local files, use Folder only for a DICOM directory, or create an empty dataset and add samples later.
- From deployment: choose a deployment, filter its execution table by successful or failed status, select matching rows or all results, and optionally assign None, Training, Validation, or Test.
- Create with API: use a server-side script for large directories or repeatable ingestion.
- Merge datasets: combine at least two compatible datasets into a new dataset.
- Open the creation dialog
Go to Datasets and choose New Dataset.
- Select the source
Choose Upload dataset, From deployment, Create with API, or Merge datasets according to where the samples already live.
- Describe the destination
Enter the required name and description. Avoid patient, customer, or other confidential identifiers in either field.
- Review source-specific choices
Confirm the source, compatible data type, optional split, and any classification label shown for the selected workflow.
- Create once
Submit the dialog once and follow the progress state instead of repeating the request.
Upload local files or a folder#
Before you begin
- Use stable, unique filenames so later annotation imports can match samples reliably.
- Organize folders before upload and test unfamiliar formats with a small representative batch.
- Select Upload dataset
Choose Files for ordinary batches. Choose Folder only for a DICOM directory. Leave the selection empty only when you intentionally want an empty dataset.
- Confirm the detected workflow
Review the selected items, data type, and any optional split or label controls that appear for that workflow.
- Start the upload
Choose Upload, or Create when no files are selected. Keep the browser open while file transfer is active.
- Minimize without losing progress
Use the upload window controls to continue other platform work while the queue reports per-file and overall progress.
- Verify durable processing
Wait for the transfer and processing states to settle, then refresh the dataset and confirm its format and resulting sample count.
Add samples to an existing dataset#
Before you begin
- Open an editable destination dataset.
- Confirm that source and destination data types are compatible.
- Check whether the destination test split is locked before assigning new samples.
- Upload new accepts local files or folders and reports asynchronous transfer and processing progress.
- From other datasets lets you search compatible datasets, select individual samples or all matching samples, and copy them into the destination.
- From deployment lets you filter the execution table by successful or failed status, select matching executions or import all, and monitor queued or running work plus added, duplicate, skipped, and failed counts.
- Local files registers files already visible under the configured shared root without uploading their bytes.
- Add with API provides the programmatic path for large local directories and repeatable ingestion.
- Open Add Samples
Open the destination dataset, choose Add Samples, and select the source tab.
- Choose the source items
Select files, a compatible source dataset and its samples, or deployment executions. Use search and status filters when the source list is long.
- Apply optional metadata
Choose None, Training, Validation, or Test when available and, when relevant, a classification label and value. A locked destination does not accept new Test assignments.
- Submit and monitor
Start the operation once, keep the progress view available, and wait for a terminal state.
- Review the result
Refresh the dataset, confirm the added count, and inspect duplicate, skipped, or failed records before retrying anything.
Register files from a configured shared root#
Before you begin
- Place the source under the shared root approved for your workspace.
- Use a root-relative path; paths outside the configured root are not eligible.
- Confirm the intended data type before previewing the registration.
- Choose Local files
Open Add Samples, select Local files, choose the configured root, and enter the root-relative source path.
- Set discovery options
Choose whether to scan recursively and, when useful, limit the number of matches or derive a label value from each parent directory.
- Set destination metadata
Choose an optional split and classification label and value. Do not choose Test when the destination splits are locked.
- Run a dry preview
Preview the registration and review matched, newly created, attached, duplicate, and skipped counts before committing it.
- Register and verify
Run the registration, then open representative samples to confirm that the platform can read the referenced files.
Create with the API or merge compatible datasets#
Before you begin
- For API ingestion, create an API key in Settings and use a server-side environment with Python and an HTTP client.
- For a merge, decide whether source split membership must be preserved.
- Follow the API workflow
Create the dataset, upload samples with the intended data type and optional split, then append annotations only after sample creation succeeds.
- Protect the API key
Keep the raw key in a server-side secret and never place it in browser code, screenshots, or source control.
- Or choose merge sources
Search for and select at least two compatible datasets, then name and describe the merged destination.
- Choose split preservation
Enable the preserve-splits option when corresponding Training, Validation, and Test membership should carry into the merged dataset.
- Verify the destination
Confirm sample counts, labels, annotations, and split membership after ingestion or merging completes.