Test prediction inputs and explainability
Provide the correct input for image, medical, tabular, or language models and inspect summaries, artifacts, explanations, and execution history.
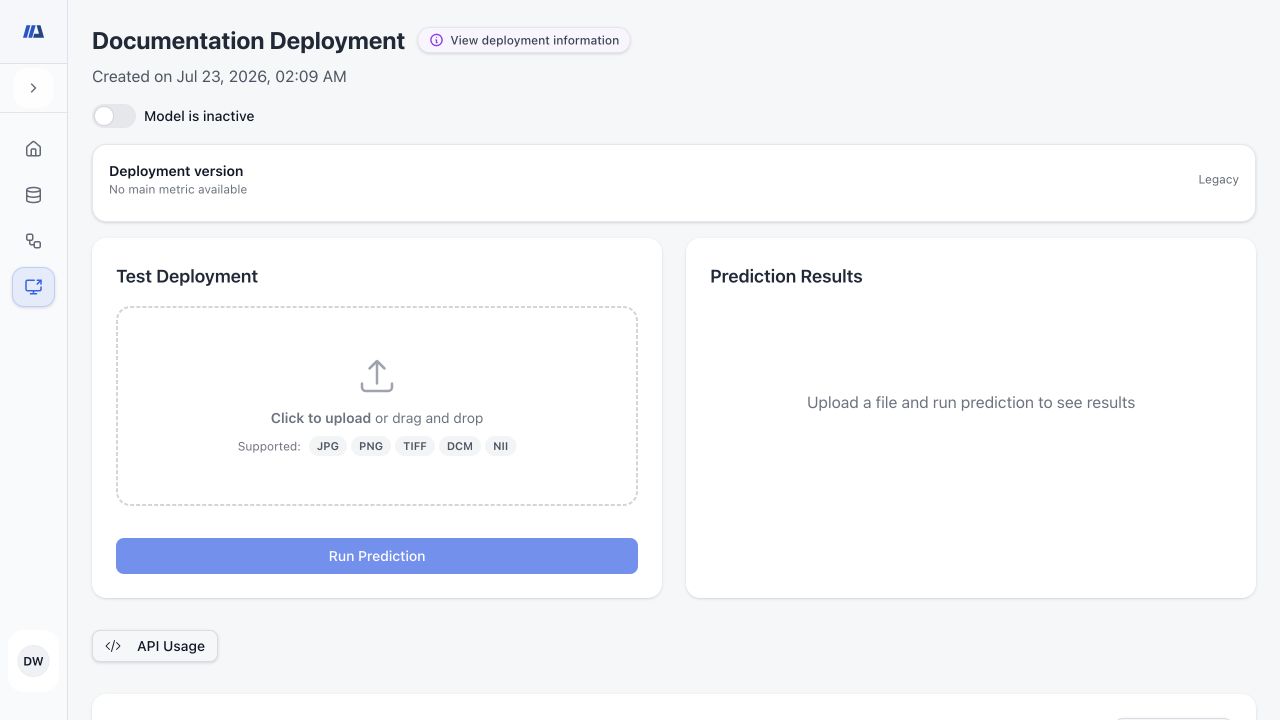
Provide the task-specific input#
- Confirm the task before entering data
Read model information and make sure the deployed model expects the modality and feature structure you plan to submit.
- Upload image or medical input
For compatible vision and medical models, drag or choose a supported image, TIFF, DICOM, or NIfTI input. Review the selected file before submission.
- Enter tabular features
For tabular models, complete the displayed feature fields using the same units and categorical conventions used during training.
- Configure language generation
For a language model, enter the prompt and set the exposed maximum-token and temperature controls. Start conservatively and avoid sensitive prompt content.
- Select Run Prediction once
If an inactive-model confirmation appears, cancel unless you are authorized to activate the deployment. Otherwise confirm and wait for the visible processing state to finish.
Review prediction output and explainability#
- Read the prediction summary
Start with the task-aware summary and target legend. Confirm that the displayed result belongs to the input and deployment version you just used.
- Inspect the raw response
Use the raw-response view or download for the complete structured result. Treat it as model output, not a clinical or operational decision by itself.
- Review result media
For media tasks, inspect the protected output, overlays, masks, boxes, classes, scores, or generated media available for that task.
- Inspect panoptic results when present
For compatible panoptic segmentation, use the legend and overlay to distinguish semantic classes and individual regions, then cross-check the raw response.
- Review explainability
For tabular models, inspect available SHAP waterfall or force views. For image models, inspect the configured Grad-CAM or Integrated Gradients output. Explanations indicate model influence, not correctness.
- Open execution history
Use history paging to find the test and select View to reopen its saved result. Confirm its state before using it in a report.
Use the cURL and Python examples safely#
- Open API Usage
Choose the cURL or Python example that matches your server environment.
- Keep placeholders until integration
Do not paste a real API key, private input, or production identifier into documentation, screenshots, issue reports, or client-side code.
- Load secrets on the server
Store the API key in a server-side secret manager and supply the required authentication header from trusted code.
- Follow the Headless API guide
Use the Headless API documentation for authentication, request fields, asynchronous status, protected artifacts, and endpoint-specific error handling.