Create and configure a model pipeline
Start a new training workflow or restore a pipeline snapshot, then confirm the dataset, instructions, backend, and explainability settings.
Check availability#
- The Pipelines list loads the newest accessible rows needed for the current viewport first and shows each pipeline’s name, description, last update, final metric, and current status.
- Scroll toward the end of the list or choose Load more when offered. Later rows append without clearing the pipelines already loaded.
- If a later page fails, the loaded rows remain available; choose Retry or Load more to continue from that point.
- Visible statuses can include Not Started, Planning, Pending, In Progress, Interrupting, Interrupted, Completed, Failed, and Ended.
- Live status text can provide more detail while work is queued or running; the durable pipeline status remains the source of truth after a refresh.
Create a new training pipeline#
- Open the creation dialog
Select Train New Model from Pipelines, the dashboard, or an eligible dataset.
- Choose Train New Model
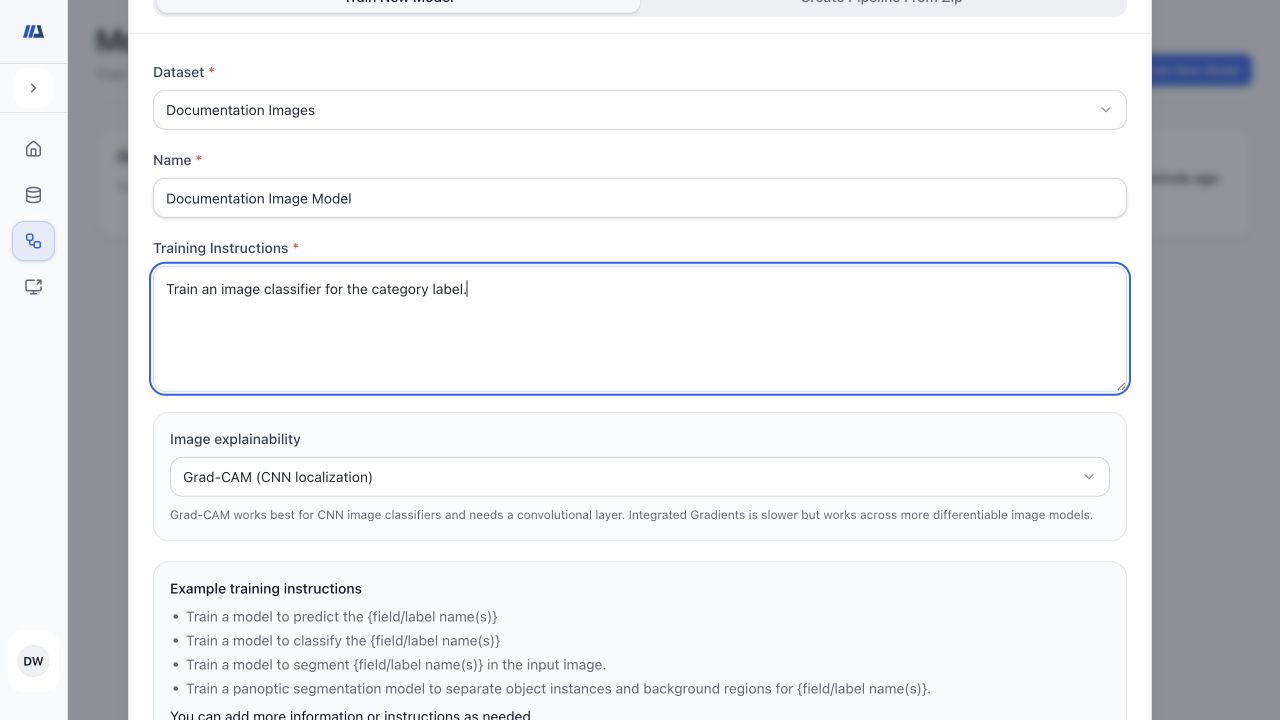
Use the new-model tab for a fresh plan. Select the prepared dataset and enter a clear pipeline name.
- Choose the backend when offered
If the workspace provides multiple ML backend profiles, choose the one intended for this workload. If no selector is shown, the available backend is selected automatically. Each completed version later shows the backend actually pinned to that version.
- Write a specific instruction
State the target, task family, important metric, constraints, and any required behavior. Planning combines that instruction with the dataset to choose a compatible architecture, so the creation dialog does not require a separate architecture choice. Keep sensitive data and real subject identifiers out of the instruction.
- Select image explainability
For compatible image tasks, choose None, Grad-CAM, or Integrated Gradients. This choice controls which explanation artifacts the completed run can produce.
- Create and wait for planning
Submit once. The pipeline is created before training starts, and its generated plan may take time to appear.
Create a pipeline from a ZIP snapshot#
- Choose Create Pipeline From Zip
Open Train New Model and switch to the snapshot-import tab.
- Select the snapshot
Choose the ZIP file and give the imported pipeline a clear name.
- Choose dataset handling
Preserve uses the snapshot dataset relationship when it remains available, Replace attaches a compatible dataset you select, and Detach imports the pipeline without a dataset relationship.
- Review the imported state
After import, confirm the dataset, resources, version history, and checkpoint availability before attempting to continue or run again.