Annotate image samples
Set up labels, draw and review image annotations, and save work without losing sample context.
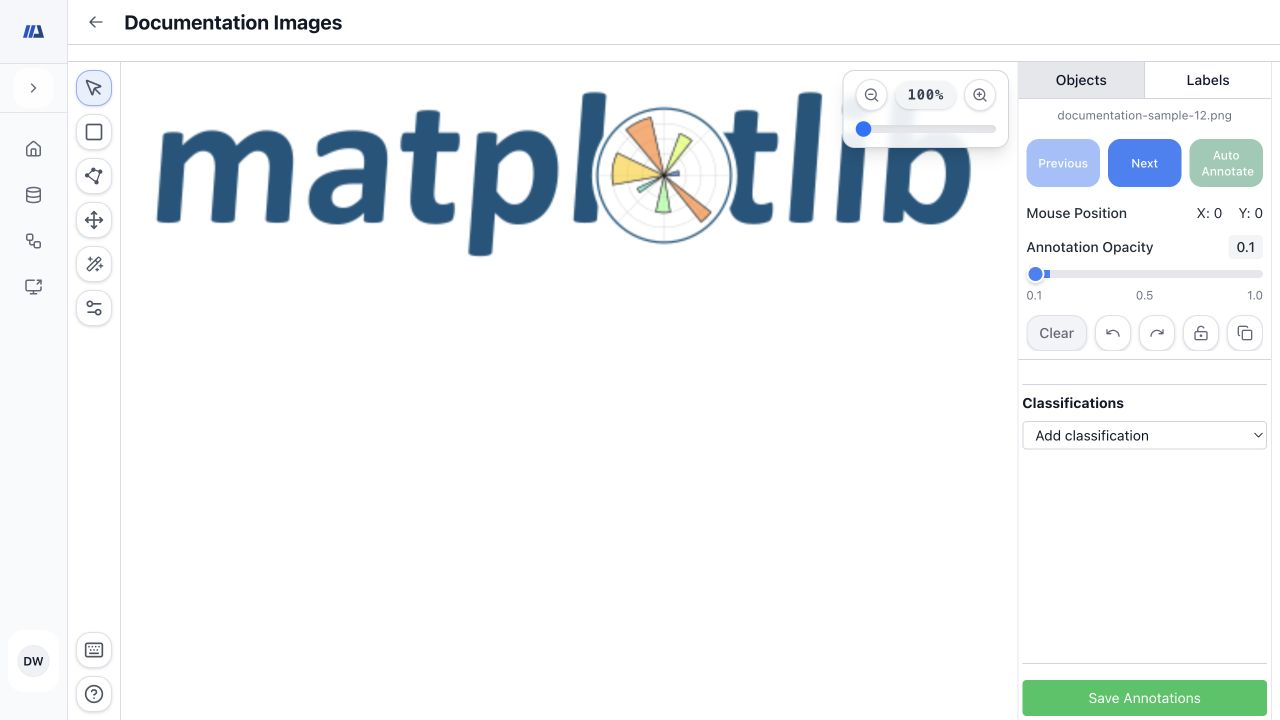
Availability and access#
- Start from the dataset detail page and choose Edit Annotations for the intended sample set.
- Check the sample name and dataset before drawing; Previous and Next change the active sample.
- Use the medical and volumetric guide for video, DICOM, NIfTI, TIFF, and ZIP-backed medical samples.
Set up labels and classification values#
- Open Labels
Create or review the dataset label set before drawing. Reuse the same spelling and meaning throughout the dataset.
- Define values and colors
Add the allowed values for categorical labels and choose distinct colors that remain readable over the source image. Custom values can be entered when the label permits them.
- Choose a default label when useful
Set a default label for repetitive work only after confirming that it is correct for the current annotation batch. You can still change an individual object before saving.
- Separate objects from classifications
Use Objects for boxes and polygons tied to a location. Use Classifications for sample-level categorical information that does not require geometry.
Draw and label an image#
- Choose Select, Rectangle, or Polygon
Use Select to inspect and reposition existing work, Rectangle for a bounded object, or Polygon for a contour that needs multiple points.
- Create the geometry
Drag to create a rectangle. For a polygon, place points around the boundary and complete the shape. Keep geometry inside the visible sample and avoid unnecessary points.
- Assign the label and value
Select the new object in Objects, then choose its label and value. Add a Classification separately when the whole sample needs a categorical value.
- Inspect the overlay
Adjust Opacity and Zoom to compare the annotation with the source. Image Adjust changes the viewing controls, not the saved source pixels.
- Save annotations
Review all visible objects and classifications, then save before leaving the page or switching to unrelated work.
Review, navigate, and protect work#
- Move a selected shape or its anchors to correct geometry. Add or remove polygon anchors only when the boundary requires it.
- Use Clear to clear the current selection; it does not replace a deliberate delete action.
- Use Undo and Redo for recent canvas edits, and save the corrected state explicitly.
- Use the annotation lock when you need to prevent accidental changes while reviewing.
- Persist Annotation copies eligible annotations forward to the next frame or slice; verify the copied result before saving.
- Use Previous and Next for samples and the frame or slice controls only for temporal or volumetric data.